Posts

Showing posts from 2017

Next finished knife - K.I.T.H.

Image
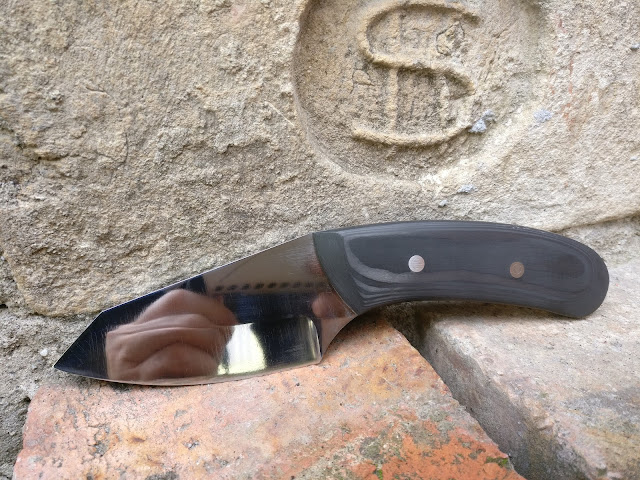
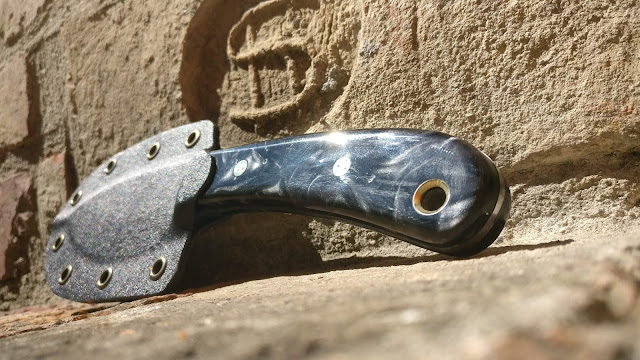
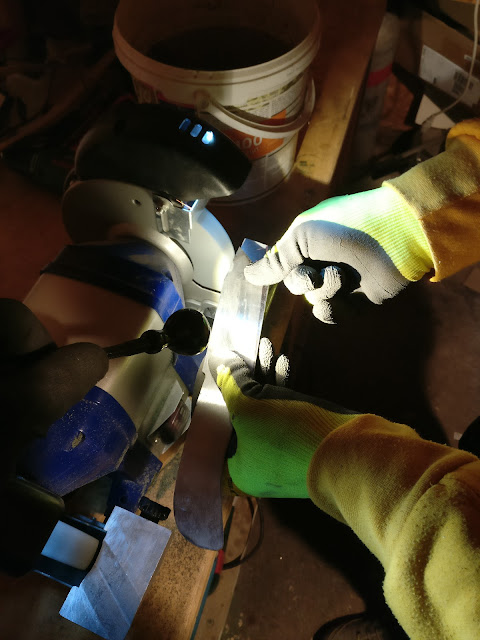
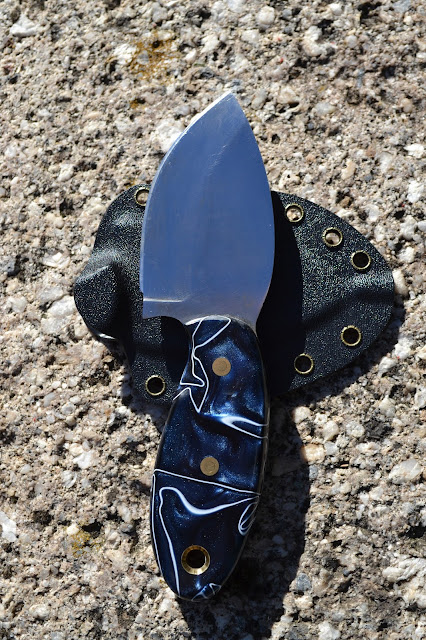
I kinda feel repeating myself: Havent been around for a while. I have started a local Knife in The Hat (K.I.T.H.)  event here, and this is my knife to be offered. Enjoy. My next finished knife after  the customers one is this fellow here: Bill of materials: O1 tool steel 3mm Loveless stainless screws Carbon laminate handle  A few pics of the process: Template credit goes to Dan @ DCKnives.com this was originally his DS1 template, redrawn by a fellow knifemaker. Cheers mate for the cool templates! DS1 on the right, and the re-shaped one on the left. Contoured, ready for beveling: As a rookie knifemaker, I had some issues making the bevel symmetrical on my litllte grinder, that runs 37m/s. But nailed it! The carbon laminate, tested for looks Here it goes. The one with the holes in the tang is this one. The one without holes is his sibling, made from 1.4116 stainless steel. Have to admit, I love this shape: Current O1 projects after

All around knife for a customer

Image
Recently I was approached by a customer to make a knife for her father. I drew a drop point knife, as she liked one of my previous designs ( the 3rd one, with the gut-hook ). Since her father has big hands, I have stretched the handle to 13cm, and have re-drawn the blade without the gut hook, and erased the extra grip in the front of the handle. (I am actually making the original design currently too, it is almost finished, only needs buffing, sharpening and a sheath. Will post link here too, as soon it is ready) Drop point knife making It might not look similar, but the one in the middle was the basis for the one below, that has been made here :) The second knife is the basis, and the third one is the end-result. I have followed the curve of the hook, and brought it to the spine. Handle has been stretched to 13cm too. Also erased the extra finger groove. I started documenting the process on video, yet -as usually- at some point I forgot to take my GoPro with me. :( H

Tanto | Knife of a friend

Image
On Good Friday I invited a friend over. He has been hepling me with his expertise building my kiln, and other projects, so we decided it was time, to start his knife. He came up with his own tanto design, he drew based on several existing knives. Unfortunately for us, we forgot to film/photo his work, so I have only a few moments as evidence. We pretty much forgot to film the drawing and cutting part, but hey.. we have some footage from grinding it :) Material: O1 tool steel 40x3 mm stock Grinding the shape of the tanto He cut the shape with a zip disc, and started shaping the knife with the double grinder. Squaring the edges with Dremel Trio Here is the final shape. Clean design, that features a very solid grip. He squared the edges with a Dremel Trio up. You can see the Dremel Trio upside down. Filing with the jig. Easy peasy Beveling the knife with a filing jig. It was a nice experience to file a straigh

Heat treat oven - electric

Image
Making my DIY heat treat kiln I started this build back in summer 2016 by buying all the necessary parts for the kiln: Close to finish Bill of materials: Heating element (wire coil, 80cm long, 5mm thick, rated 3.500W)  PID Controller: Rex C100 + 1.250C K-type thermocouple Solid State Relay (SSR, 25Amp) Aluminum heat sink for SSR Old PC fan and box 1.200C for the top, bottom and the door of the kiln, theese bricks will not touch the heating element 1.500C for the walls, theese will incorporate the heating wire Some angle iron (40x40x2mm) Door hinges  Basic layout of DIY heat treat kiln Basic layout I started assembling the core of the kiln. I used a Dremel 566 attachment to shape the groove, accomodating the heating element. I had to cut one thick brick in half, you can see it in the following picture, where one half of the cut piece is in the middle of the floor and the other in the roof ot the heat treating kiln. Bottom assembly of heat treat

Ratot - my own design

Image
Hi there, havent been around for a while, have been psychologizing a lot, not leaving any time for my dear hobby. Since I managed to get away for a few hours only, I forgot to make enough pics. My bad, I'm sorry. But... here we go. A knife for a friend: In the last days of 2016, I have started a new knife, based on my own design. You may have seen it in this article. And now, in 2017 I have continued working on it. I guess we can say, im working on this knife for a year now :D:D The idea behind this knife was to make a  uncommon all-around knife. Since it is made from a 3mm thick material, it should take abuse (wood chopping/splitting, camping use, etc.) pretty easy. I know, lot of people in the US enjoy thicker blades, like 5mm+ (0.196 inches), but I believe, for a regular use, 3mm should be just fine. Blade material: O-1 tool steel  (1.2510 in the EU) 50mm wide, 3mm thick Heat treatment: My little gas forge Hardness: ~60 HRC (2x230 C cycles) Handle: Kirinite Cyc